
You are currently browsing the category archive for the ‘art tips’ category.
i forgot that i already scheduled a blog post for today so this is #2… ah well.
for those who know me, my deep adoration for poison bottles and specimen vials is pretty obvious. it’s a year-round, deep and passionate love, but during this time of year i think a lot more people share my penchant for such things. as such, i’ve just created and posted two new digital collage sheets for the altered bits site (click to enlarge):
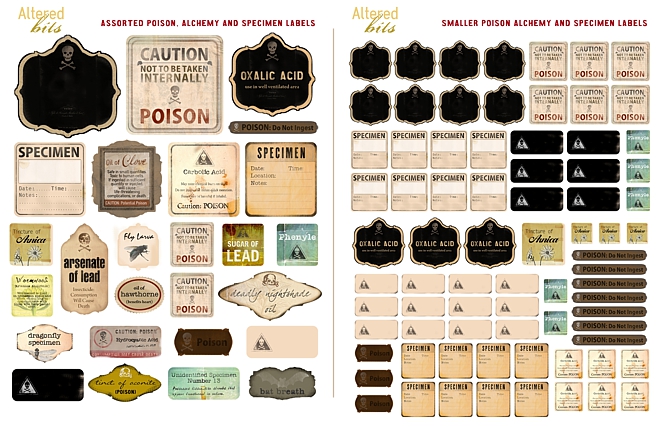
you can find these and 7 other new digital collage sheets here: http://alteredbits.com/digital-collage-sheets.php
do you want to know how i create some of the aforementioned poison, alchemy and specimen labels i use in a lot of my assemblages and books? then read on!

this is an extremely easy process and it’s both fun and super cool looking. use them in a cabinet of curiosities or oddities assemblage or book, or just display them on a shelf. once my stupid over-priced epson printer is fixed (their warranty service is not my friend today — one would think for $2600 you’d get more than a year of coverage) i’ll be making lots more with the new labels i created. [cross your fingers my husband can fix printers — he’s super handy and has recently fixed a stove (twice), a washing machine, a toilet, a sink, a car bumper that decided to fall off, a rototiller, a few musical devices, a broken deadbolt and some other stuff — he’s pretty amazing so a printer should be a cake walk… but i digress…]
okay… to start, you will need this stuff or similar alternatives:
- a bottle of any sort, filled with your specimen(s), or whatever you’re using (there are usually lots of little bottles on the Altered Bits site).
- natural beeswax and something to melt it in
- acrylic paint (burnt umber is used above)
- a paintbrush
- a baby wipe or other moist wiping device
- some sort of scraper can be a carving tool, a super-sharp pencil, a thick needle, an awl, etc.
once your bottle is filled and corked (or capped if that’s what you’d doing), melt some beeswax. when thoroughly melted, dip the top of your bottle into the wax to cover it, and let it cool. keep dipping the top into the wax and let it solidify between dips until you feel it’s built up enough. i typically dip about four or five times for small bottles, more for larger. Set aside and let it dry/harden for about ten minutes.
with your carving tool (or needle or whatever you’ve opted to use), carve some random scratch marks into the wax. pierce it, puncture it, and carve it to give it an old or aged look. remove all little waxy remnants.
now whip out your paint and paintbrush. paint it all over the wax, taking extra care to get it into the grooves and divots in the wax. now wipe the paint off of the smooth parts of wax – the paint will stay pooled in the scratches, cracks and divots and look really quite cool.
you’re done!
(in the above specimen bottle i was going for a wormy-type effect but the green is a little NOT what i was going for. the strands that kinda look like gross tape worms are strands of hot glue i dried on parchment or wax paper and shoved inside — the green is natural food coloring but one of these days i’ll provide some way better coloring ideas. i made this about three… or five years ago and i’m smarter now.) ❤
you can find a PDF tutorial of this here, complete with at least one typo (scroll to the bottom of the page): http://alteredbits.com/art-tutorials.php i’ll actually be adding a couple more “waxen” tutorials (waxen book and waxen dolls) in the coming months as well as recipes for natural dyes, assemblage projects and other fun stuff.
seth at the altered page has begun his multiple secret sunday survey sharings on his blog. at some point today he will be featuring a handful of artists and sharing some of their secret art techniques. i do believe that i will be one of the featured artists this week too. 🙂 can’t wait to check it out (haven’t peeked yet today)!

in the spirit of sharing secret art tips, i have another for you. it’s more comical than useful though. in short, i LOVE baby wipes and use them constantly while working on my art. i’ve always gotten the all natural organic cotton ones by 7th generation but they recently jumped to a stupid $9 for a small refill pack. yeah, whatever. so, i got a cheaper brand this time. i pulled one out and chuckled at the funny little cartoon animals on them and thought nothing more of them… until…
i had just finished a layer on a piece i’ve been working on for forever and a half for my sweet friend lisa of mudhound primitives when i noticed something peculiar. it looked like there was a little sheep in my paint:

see the two little fluffy sheep? it took me a moment to figure it out until i spied this sitting a few inches away:

these little sheepies matched the print in my piece. thankfully that was one of the bottom layers so you can’t really see it anymore.
so, if you use baby wipes and don’t want cute little creatures popping up into your paintings, you may want to go with a non-quilted brand.


 Altered Bits Gallery and Shop
 AlteredBits' Barterable Bits